

NOTE: We are not suggesting that users leave the laser engraver unattended. The purpose of the wireless connection with LightBurn is to avoid exposure to the smoke generated during plywood cutting and the toxic fumes from acrylic cutting or engraving, even when using an enclosure. Additionally, camera monitoring ensures that your eyes are not directly exposed to the laser light.
What's the benefit?

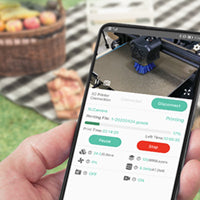
Fully Wireless Connection
No USB cable between LightBurn & Engraver

More Convenient
Laptop or PC can both work for laser engraver

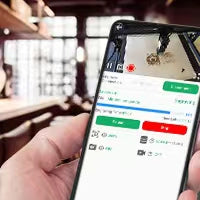
Protect Eyes
Monitor by Lasercam for live video to protect eyes

Away from Smog
Avoid exposure to smoke and toxic fumes
How to connect?
A. Prepare
To acheive the wireless connection feature, you need to ensure that the Lasercam and LightBurn are both upgrade to the latest version, and keep the laser engraver, Mintion Lasercam camera and your laptop or PC computer in the same LAN (Local Area Network).


Same LAN
Laptop or PC and Lasercam camera should be in the same LAN
NOTE: There're two parts for fully wireless connection, Process of Wireless Data Tramsimission & Wireless Video Streaming.
B. Process of Wireless Data Tramsimission
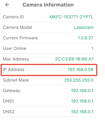
1. Check the IP Address of Lasercam
After configuring the LaserCam to the Wi-Fi network, locate the IP address in the Camera Information section on the Settings page.
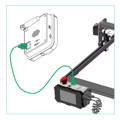
2. Plug the USB cable to the laser engraver
Plug the USB socket on the Lasercam back panel and Hi 2.0 socket to the laser engraver.
Please make sure the Lasercam and engraver are both power up first.
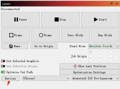
3. Add the Lasercam into LightBurn
3.1 Click "Devices" in lightburn to configure
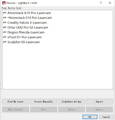
3.2 Click "Create Manually" to add
3.3 Make the corresponding selection according to your laser engraver model in the "New Device Wizard"
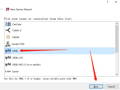
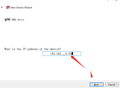
3.4 Select "Ethernet/TCP" for port connection
3.5 Enter the lasrecam IP address
3.6 Name this lasercam and set the working area
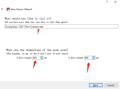
3.7 Set your laser engraver origin position

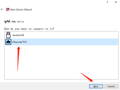
3.8 Lasercam configuration information confirmation
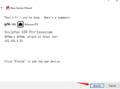
3.9 Finally click the “OK” to add
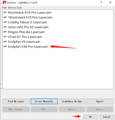
3.10 Select the newly added lasercam device to connect. After the connection is successful, the "Console" window will show the device serial port information.
C. Process of Wireless Video Streaming
1. Download the software of SplitCam
*Important: Do not update to a newer SplitCam version, as it may cause issues.

2. Check the IP Address of Lasercam
After configuring the LaserCam to the Wi-Fi network, locate the IP address in the Camera Information section on the Settings page.
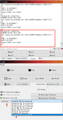
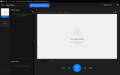
3. Run the SplitCam and Add the Lasercam
Run SplitCam and find out the + button to add the Web Browser.
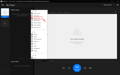
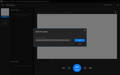
4. Input the IP address of Lasercam
Input the webpage IP address of Lasercam, the format is(Only change the BLUE color for IP address):
http://{Camera IP address}/ipcam/mjpeg.cgi
For example: http://192.168.0.93/ipcam/mjpeg.cgi
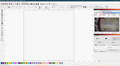
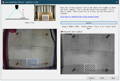
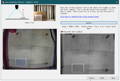
5. Run LightBurn and add the SplitCam Video Driver
Run LightBurn and select the camera: SplitCam Video Driver. Adjust the image in SplitCam to fit within the LightBurn video window, ensuring the engraver's side frames are visible. This will not affect the camera calibration in LightBurn.
Note: DO NOT close the SplitCam software when running LightBurn for camera calibration.
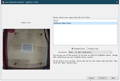
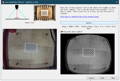
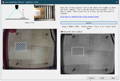
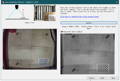
D. Testing Camera Calibration in LightBurn
Follow the Callibrate Camera steps in LightBurn to capture image
Select the SplitCam Video Driver during camera selection. Use the calibration card to capture the image, aiming for a lower scope number for better results. The flatter the calibration card, the better the results.
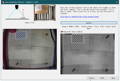
Note: LightBurn will capture the maximum video input, but it is unclear why SplitCam outputs at a 3MP resolution (2048x1536) when the LaserCam is only a 1080P (1920x1080) resolution camera.
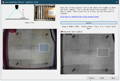

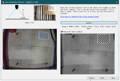
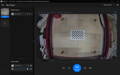
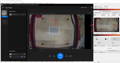
Live Video Streaming and Console Window in LightBurn
Minimize the SplitCam software to display a small floating video streaming window at the top. With the wireless connection to LightBurn for the Console window, you can more easily monitor the engraving or cutting job.
NOTE: We are not suggesting that users leave the laser engraver unattended. The purpose of the wireless connection with LightBurn is to avoid exposure to the smoke generated during plywood cutting and the toxic fumes from acrylic cutting or engraving, even when using an enclosure. Additionally, camera monitoring ensures that your eyes are not directly exposed to the laser light.
Operational Video Guidelines
