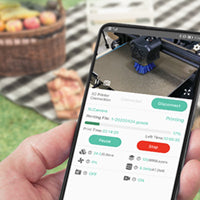
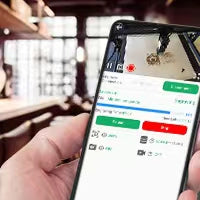
How the LightBurn Wirelessly Connect to the Laser Engraver by Lasercam?
Update: 2024-2-23
NOTE: Please refer the latest guideline article(20240522)-->Mintion Lasercam fully wireless connection with LightBurn

What's the benefit?
Wireless Connection
No USB cable between LightBurn & Engraver

More Convenient
Laptop or PC can both work for laser engraver

Protect Eyes
Monitor by Lasercam for live video to protect eyes

Away from Smog
No need to stay near the engraver to avoid smog
How to connect?
A. Prepare
To acheive the wireless connection feature, you need to ensure that the Lasercam and LightBurn are both upgrade to the latest version, and keep the laser engraver, Mintion Lasercam camera and your laptop or PC computer in the same LAN (Local Area Network).

Same LAN
Laptop or PC and Lasercam camera should be in the same LAN
B. Process
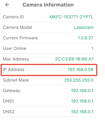
1. Check the IP Address of Lasercam
After the Lasercam is configured to the wifi network, please find the IP address in the camera Setting page of Camera Information section.
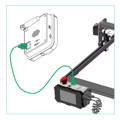
2. Plug the USB cable to the laser engraver
Plug the USB socket on the Lasercam back panel and Hi 2.0 socket to the laser engraver.
Please make sure the Lasercam and engraver are both power up first.
3. Add the Lasercam into LightBurn
3.1 Click "Devices" in lightburn to configure

3.2 Click "Create Manually" to add
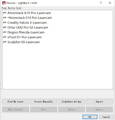
3.3 Make the corresponding selection according to your laser engraver model in the "New Device Wizard"

3.4 Select "Ethernet/TCP" for port connection

3.5 Enter the lasrecam IP address

3.6 Name this lasercam and set the working area

3.7 Set your laser engraver origin position

3.8 Lasercam configuration information confirmation

3.9 Finally click the “OK” to add
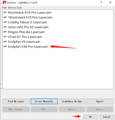
3.10 Select the newly added lasercam device to connect. After the connection is successful, the "Console" window will show the device serial port information.

How to check the live video?
There're two ways to approach the live video feed when the Lasercam is wifi configuration successfully. With the live video streaming, you can easily to check the engraving/cutting process in the laser engraver enclosure.
Input Lasercam IP address with interface
Input the IP address and login with password to the Lasercam.
For example: http://192.168.0.58

Input Lasercam IP address with video feed
Input the IP address with video compression protocol.
For example: http://192.168.0.58/ipcam/mjpeg.cgi

Future development for Lasercam & LightBurn
In the coming future, we are working with the LightBurn team to develop a wireless video. At the current LightBurn camera calibration solution, all the cameras connect to LightBurn (PC/Laptop) by a USB cable and depend on the cable length on distance. In the future, the Lasercam will also support adding wirelessly for video. That means the LightBurn (PC/Laptop) and the laser engraver don't need any more cable, even for the camera calibration and image tracking.

